
One of the greatest aspects of Power Platform is the autonomy it gives your citizen developers to build low-code/no-code apps, automate processes, and gain valuable insights, all without burdening IT. However, for many, all this power in the hands of end users doesn’t come without concerns, particularly around the security of your organization’s data.
Because Power Platform’s solutions are often integrated with Microsoft 365 and other SaaS and on-premises business data sources, it’s understandable to fear a poorly built workflow or buggy app may expose or even damage important data. That’s where Microsoft’s data loss prevention policies come in.
Here’s how you can utilize Microsoft’s data loss prevention (DLP) policies in Power Platform to protect your organization’s data.
What Are Power Platform Data Loss Prevention Policies?
The purpose of DLP policies is as the name suggests: to secure your data and prevent unintentional data exposures. You likely already use DLP policies to protect your data in Microsoft 365, and the same principles would apply here. Like M365, you need to be an admin (tenant or environment) to create them, and they must be created in the Power Platform admin center.
In Power Platform, DLP policies are applied to Power Apps canvas apps and Power Automate flows to control Connectors, which is how users access prebuilt actions and triggers to build their apps and workflows.
It may seem unlikely that your users can use Connectors to do something drastic to expose or damage your data, but you need to remember how powerful Power Platform is. Connectors are built to connect your data with effective, efficiency-driving services (in this case, apps and flows), and it’s essential you put guardrails on how they interact with other Connectors in the same flow or apps.
For example, your company may use an automated workflow to populate entries of monthly sweepstakes into your CRM. As part of this workflow, you may also use the Twitter Connector to announce winners. Through this workflow, you are combining multiple Connectors, allowing one to access sensitive data through the other.
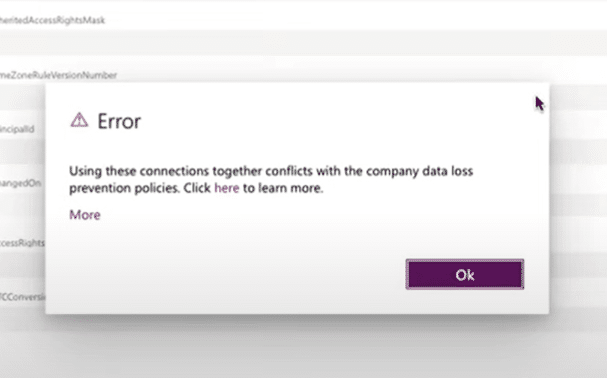
What’s wrong with this? Well, one little change in the workflow could cause the Twitter Connector to accidentally pull sensitive data from your CRM – like your sweepstake participants’ addresses – and share them on social media. However, if you have a DLP policy in place, preventing a Connector that pulls from your CRM from being in the same workflow as a Connector that outputs to Twitter, this sort of mistake can be avoided.
DLP policies can do more than prevent mistakes, though; they can mitigate the risk of cybercriminals as well. Say an outside threat (or even malicious insider) gets access to your environment. Through Power Platform tools, they can easily create a workflow to copy sensitive data from your data source to one of their own. However, with a DLP policy in place that prohibits a Connector from copying data to outside data sources (say, Dropbox or Google Workspace), these threat actors will be thwarted.
It’s simply too easy – inadvertently or not – to expose private data like credit card information or social security numbers when using powerful tools like Power Automate and Power Apps. The answer isn’t to avoid these solutions; it’s to create a security strategy that prevents these mistakes from happening, starting with Microsoft’s DLP policies.
Getting Started With DLP Policies in Power Platform
Microsoft has a thorough overview for those getting started with DLP policies in Power Platform, but an easy way to begin building your DLP policies strategy is by following the below steps. From there, you can refine your strategy based on what is working and what issues continue to arise.
1. Classify your Connectors
Connectors can be configured into three classifications: Business, Non-business, and Blocked. Note: The group labels “Business” and “Non-business” do not have significance but are simply names for the different groups of Connectors. How you group your Connectors is what gives them meaning.
These classifications dictate what Connectors can be used together in an app or flow. For example, a Connector classified as a Business Connector can be used with other Business Connectors but not Non-business Connectors. The same goes for Non-business Connectors, which can be used with other Non-business Connectors, but not Business Connectors. Any Connector from a Blocked group cannot be used for Power Apps or Power Automate.
Until you classify your Connectors, they will all be configured as Non-business, so this is an important exercise to do as soon as you begin using Power Platform to protect data sources with sensitive information.
Start by identifying any Connectors with access to sensitive information – think CRMs and electronic agreement tools. Bucket these in groups and classify them by one of the above labels. Then, group the rest – such as your Connectors to project management platforms or PDF readers – into the other bucket. For your most sensitive information, like data in your identity management tools, “Blocked” classification may be the best course of action to prevent any exposures.
2. Understand each environment’s purpose
DLP policies can be applied at the environment or tenant level, but they cannot be applied at the user level. Both tenant and environment policies will likely have a place in your strategy.
A tenant-wide policy helps prohibit risky actions (for example, you don’t want any app or flow to share information to public forums like social media) but could block productivity if the policy prevents users from doing their job. Note: Tenant policies will trump environment policies.
Environment-level policies allow you to tailor policies to the purpose of your environment. For example, you likely want to apply more strict policies in your training environment to prevent trial-and-error workflows from causing real damage in one of your data sources when it leans more toward “error” than “trial.”

Once you understand what work is done in each environment, you can better create policies that make sense for each. For example, if you have separate environments for your Marketing and HR teams, you need to understand what sort of apps and flows they are creating; a workflow that triggers a welcome email might require different policies than a workflow that populates employee PPI into your HRIS.
Understanding the context of your environments will become essential in the next step when we begin to build policies.
3. Establish your DLP strategy and create policies to support it
Now, you are ready to create a policy. When getting started, Microsoft recommends starting more restrictive, particularly for environments with citizen developers. For example, you could create a tenant-wide policy to limit Connectors available to only standard offerings like SharePoint and Outlook. Then, you can build additional environments for specific business units to create their line-of-business applications and workflows or for IT to troubleshoot and build relevant apps.
As your team’s usage matures, you can build environments with less restrictive policies to allow trusted resources room to create smart and relevant apps and flows. Remember, like all security strategies, simple is better, so don’t add too many policies or environments that will overcomplicate management.
To create a policy, navigate to the Power Platform admin center at admin.powerplatform.microsoft.com. On the left sidebar, select Policies > Data Policies. If you have already created some policies, they will be listed here. This is also where you build any new policies.
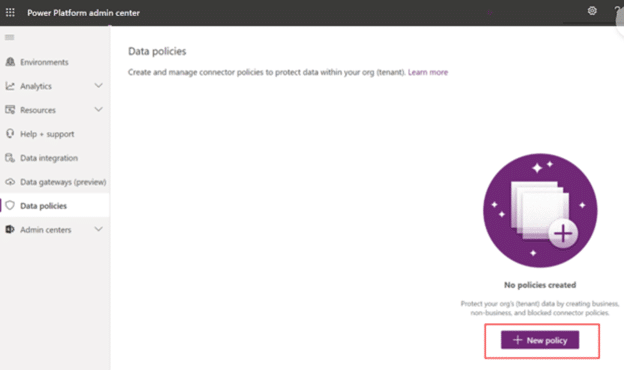
Policies are simple to create and can be completed in just a few minutes if you’ve done the prep work in the above steps. The wizard will walk you through the steps – name your policy, select Connectors, define the scope of the policy, and select environments – and just like that, you’re one step closer to more secure data.
How to Implement Policies in Power Platform Beyond Native DLP
While the native DLP does a lot of heavy lifting on what Connectors are available for apps and workflows, in many cases, it is not enough to fully secure your data. If you want to fully enable your security and compliance policies, consider third-party solutions that can extend DLP utility to do more than control what Connectors are available.
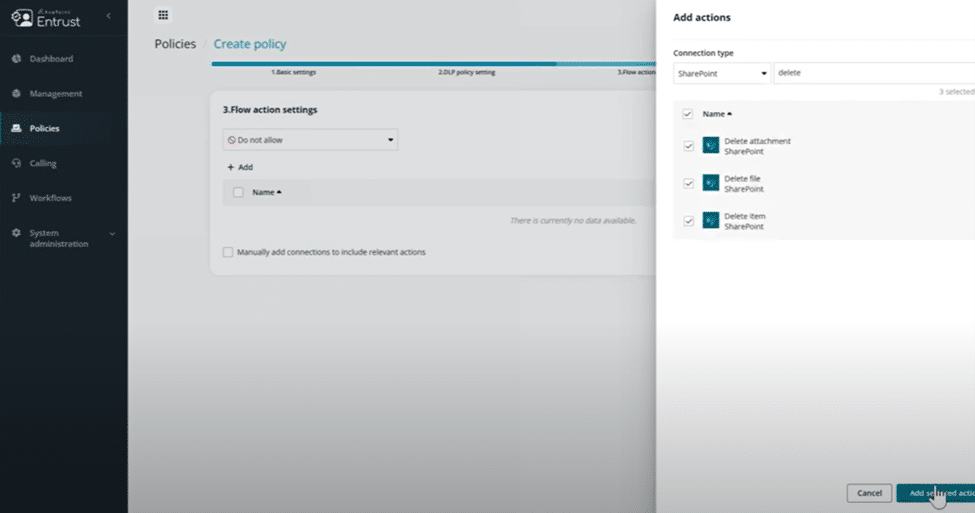
With AvePoint EnPower, you can extend your data protection strategy by creating holistic policies that combine your native DLP with what actions are available within a Connector and ensuring only people with permission have access by setting up security groups. For example, if you have an environment that only Accounting should have access to, but you don’t want to give them the ability to create an app or flow with a deletion action for SharePoint data, you can set that up. Or if your environment strategy requires regions to be in separate environments, you can set it up so that people in Germany can’t create anything within the United Kingdom environment.
It is important to note that building deeper policies requires having a good understanding of your environments and where people are building apps, flows, and reports. AvePoint EnPower can help you centralize all apps, flows, and reports into inventory lists where you can understand ownership and other metadata that may be important to your organization. And if metadata is missing, you can request the owner(s) add the missing information (i.e., department, data classification, business justification, etc.), building a complete picture for every app, flow, and report.
Final Thoughts
As your team’s usage and adoption of Power Platform grows, so will the number of users and necessary environments you need to manage, increasing complexity and potential security concerns. If you have sensitive data, it’s essential you have measures in place to secure this data before allowing your citizen developers free rein in your environments.
DLP policies are a critical security protocol on what Connectors are available to your citizen developers and can help reduce the risk of data exposure. But if you want to do more to protect your content – like prevent users from doing specific actions that could damage your data – you need a solution like AvePoint EnPower.
Pairing native DLP policies with the advanced policies capabilities of AvePoint EnPower will help transform and scale your Power Platform security strategy, ensuring sustainable management and allowing your users to safely leverage these tools.