Imagine this: A sync misfire and a cleanup script remove project folders across 120 members of your sales team. IT opens Google Vault and realizes recovery means running multiple tasks: search, export, convert, reupload, audit permissions — and repeat. That is hours of manual work while revenue-generating teams are stalled. This situation now becomes a business problem.
This is where understanding what Google Vault is – and why organizations are shifting from simple data retention to true resilience – becomes essential.
Why Manual Export Recovery is Getting Costlier
As organizations increasingly rely on Google Workspace to run their businesses, the stakes for data loss and recovery continue to rise. The numbers behind breaches and outages serve as a warning about the cost of downtime and manual recovery when SaaS is at the heart of your operations.
Consider the recent incident with Amazon Web Services (AWS). On October 20, 2025, a major outage in the US-East-1 region of AWS disrupted thousands of websites and apps – from banking and government services to streaming platforms – after a DNS failure cascaded through its infrastructure. The disruption lasted for hours, affecting businesses’ ability to process transactions and deliver services across multiple regions. This occurrence shows that even the most trusted cloud providers aren’t immune to disruption.
Here’s why manual export recovery is getting more expensive and why the stakes keep climbing for every organization:
- Incidents hurt more per event. In 2024, the average global cost of a breach hit $4.88M. Outages are less frequent but more expensive, with more than 50% of significant incidents costing over $100,000.
- SaaS is mission-critical. Forrester highlights SaaS as central to disaster recovery planning; IDC finds that many organizations still rely on native capabilities, despite their rudimentary nature, for recovery.
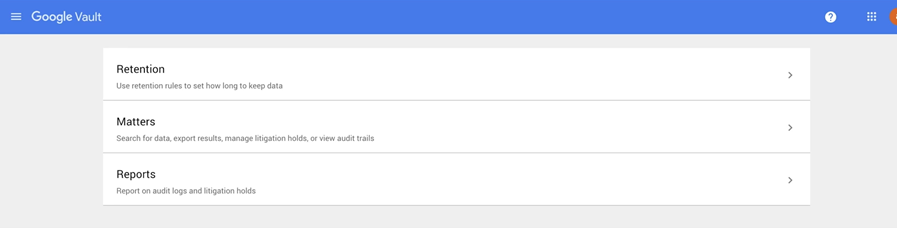
Scenarios for Google Vault and Where it Stops
Google Vault is a retention and eDiscovery tool for Google Workspace. It helps you manage your information governance by allowing you to retain, hold, search, and export your Google Workspace data, such as Gmail messages, Drive files, and other data from Google services within your Google Workspace suite.
In essence, Google Vault can help you:
- Search for data. Find specific data within your Google Workspace.
- Retain data. Keep data as long as you need by preserving it for a specific period.
- Delete data. Remove data when it’s no longer needed by purging it from your Google systems.
Google Vault is built for governance and eDiscovery: retention rules, legal holds, search, and export across supported Workspace services. It isn’t designed to restore data in place with original permissions or put users back to work quickly. Google’s own docs are explicit: “Vault isn’t a data archive or backup tool.” Vault exports are limited, inefficient for backup, and lack automated restore, which makes large-scale, multi-service data recovery slow and error-prone. Exports also expire, and you will need to recreate them if you miss the window.
Heads-up: Starting November 1, 2025, Workspace admins must have a Vault license to recover data. Without a license, admins can’t access Vault features or perform actions like searching, placing holds, exporting data, or managing retention policies.
Other constraints inflate recovery time, such as search/index boundaries (e.g., Drive comments and suggested edits aren’t searched), usage quotas, and service-specific nuances. For example, Vault can only search and export supported data types, excluding items like Drive comments, certain file metadata, and some Google services.
How Do You Use Google Vault?
Google Vault is included in many Google Workspace editions, so you won’t have to purchase additional Vault licenses for your organization unless you want to upgrade.
As we’ve mentioned, Vault has two main functionalities:
1. eDiscovery
Vault’s eDiscovery functionality lets you search, hold, and export your Google data. Admins can search and identify specific Google Workspace content via user accounts, organizational units, dates, keywords, previous messages, attachments, and supported files.
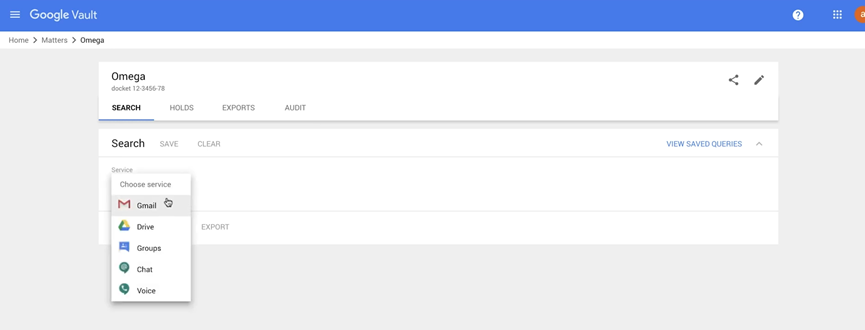
You can then preserve that data indefinitely through retention rules or export it for processing and analysis. The exported data will be available for 15 days before it’s deleted for security purposes.
2. Retention
Retention rules and holds are two of the most common actions organizations use to preserve data, and Google Vault offers both to help meet compliance regulations for sensitive data. To preserve data by retention rules, you can either set:
- Default retention rules: Set a rule for all your licensed users’ data for a particular service for a set time
- Custom retention rules: Keep data for a set time with specific terms and conditions depending on the service
While you can set as many custom rules as you want, you can only apply one default retention rule for each of your Google services. Furthermore, default rules can’t be applied to any specific accounts or periods.
Holds, on the other hand, preserve data by keeping it indefinitely until the hold is deleted, a user’s Vault license has expired, or a user account is deleted. Let’s look at how Google further differentiates the two:
Category | Holds | Retention Rules |
|---|---|---|
Use | • Created in response to an investigation, legal matter, or compliance request to prevent data deletion. | • Used proactively to control how long data is preserved and automatically deleted. |
Scope | • Can apply to individual user accounts, organizational units, or groups. | • Apply to organizational units, groups, or product entities, such as shared drives and Chat spaces. • Retention rules can’t target individual accounts directly (except via search terms). |
Preservation Period | • Preserve data indefinitely until the hold is deleted, or the user’s Vault license expires. | • Preserve data for a specified duration (set number of days, months, years) or indefinitely, depending on rule settings. |
Precedence | • Holds take precedence over retention rules. Once a hold is removed, data becomes subject to applicable retention rules. | • Retention rules don’t apply to data under a hold until it’s removed. Custom rules override default rules when both apply. • For Drive, “moved-to-trash” rules supersede other retention rules. |
Access & Permissions | • Only Vault users with access to a matter can review who and what is on hold. A user must have an active Vault license for their data to remain on hold. | • Only Vault users with retention-rule privileges can create, view, or manage retention rules. Retention rules only apply to users with active Vault licenses. |
Recent Notes / Nuances (2025) | • Users must maintain a valid Vault license for holds to stay in effect. | • Retention rules can target shared drives and Chat spaces. • Data may remain in Google systems for up to 30 days after rule expiry due to background processing. • Incorrect Gmail rule settings can cause immediate message deletion. |
It’s important to set up your retention rules promptly if you want Vault to retain your data. Otherwise, users can delete data permanently. Additionally, Vault only retains data for users with active Vault licenses. If a user’s Vault license is removed or their account is deleted, their data may be permanently purged from Vault, even if retention rules or holds were in place.
Fast Recovery That Preserves Context
When Workspace is your operating system, resilience has to go beyond storage. The goal is a recovery point objective (RPO) or recovery time objective (RTO) that you can defend, restore that preserves permissions and relationships, and controls that handle multi-cloud realities without creating governance drag. Forrester reinforces the same directive: SaaS must be incorporated in the disaster recovery (DR) plan.
That is why teams modernizing protection in Google environments integrate recovery into day-to-day operations, not just emergencies. They use capabilities that:
- Automate multiple daily backups and support point-in-time recovery.
- Restore granularly or in bulk, with permissions and context intact, so work continues where it left off.
- Extend protection to Google Classroom data, such as grades, assignments, and rosters, where native recovery isn’t enough.
- Support Google-centric strategies, such as directory/identity context and flexible storage options, as environments scale.
How AvePoint Can Help
AvePoint eliminates the need for manual recovery by delivering automated, multi-daily protection for Google Workspace — including Gmail, contacts, calendars, drives, and more. With granular restore options, flexible storage, and the ability to recover data at the item level or in bulk, AvePoint empowers administrators and users to maintain business continuity, meet compliance requirements, and minimize downtime. Advanced usability and recovery features ensure your organization can quickly respond to errors, attacks, or failures, while retaining full control over your data and collaboration.
Take Control of Your Recovery Strategy
Google Vault is built for governance and eDiscovery — not operational recovery. When disruption occurs, the real cost is incurred through manual processes and extended downtime. To safeguard productivity and compliance, organizations need solutions that restore data quickly, preserve permissions and context, and minimize business impact. The AvePoint Confidence Platform provides automated, multi-daily protection and granular restore capabilities, enabling teams to maintain continuity and resilience every day.