
Moving data between Microsoft Lists can be a manual and time-consuming task. There is no “copy” button to move an item between lists. Power Automate is perfectly suited for this task and can help streamline your list operations, increase your productivity, and has the flexibility to adapt to changing business requirements over time.
The need to move data between lists can be caused by business processes that have a change in state, like short-term status becoming long-term status, and the tracking requirements are significantly different between the two. Or moving data between lists as part of a larger data integration process.

In this blog post, we will develop a Flow solution that can be started by a user and will move a list item from the source list to the destination list while taking into account column types like Choice, Person, and Lookup, where allowing multiple selections can trip up Power Automate and complex columns like Location and Image that need more professional developer skills to master.
I am using two identically designed lists called List Operations: Source and List Operations: Destination. The list schema is shown in the table below.
| Column Name | Column Type | Column Settings |
| Title | Single line of text | Default settings |
| Choice | Choice | “Allow multiple selections” is set to yes |
| Date | Date | “Include Time” is set to no |
| Multiple Lines of Text | Multiple lines of text | “Use enhanced rich text” is set to yes |
| Person | Person | “Allow multiple selections” is set to yes |
| Number | Number | Default settings |
| Yes No | Yes/no | Default settings |
| Hyperlink | Hyperlink | Default settings |
| Currency | Currency | Default settings |
| Location | Location | Default settings |
| Image | Image | Default settings |
| Managed Metadata | Managed metadata | Custom term set Customers > Client Name |
| Lookup | Lookup | “Allow multiple selections” is set to yes and Source list set to Documents > Title |
It is important to note that my list names were created as List Operations Source and List Operations Destination. By doing so creates internal list names of “ListOperationsSource” and “ListOperationsDestination”. I changed the title of the lists to “List Operations: Source” and “List Operations: Destination” for readability.
In our later Flow pattern, the precision of the internal list name and title are very important especially for the “Send an HTTP request to SharePoint” action where both are referenced within the code snippet.
Flow build
From the command bar, click Integrate, select Power Automate and then click See your flows.
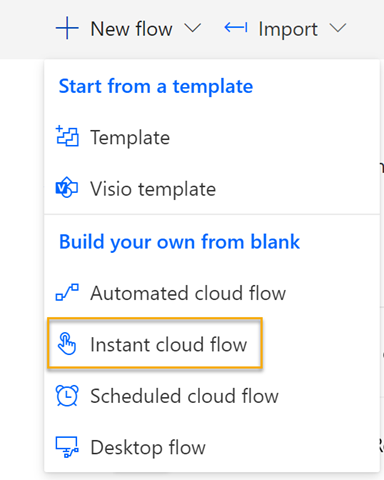
Click New flow and then click Instant cloud flow.
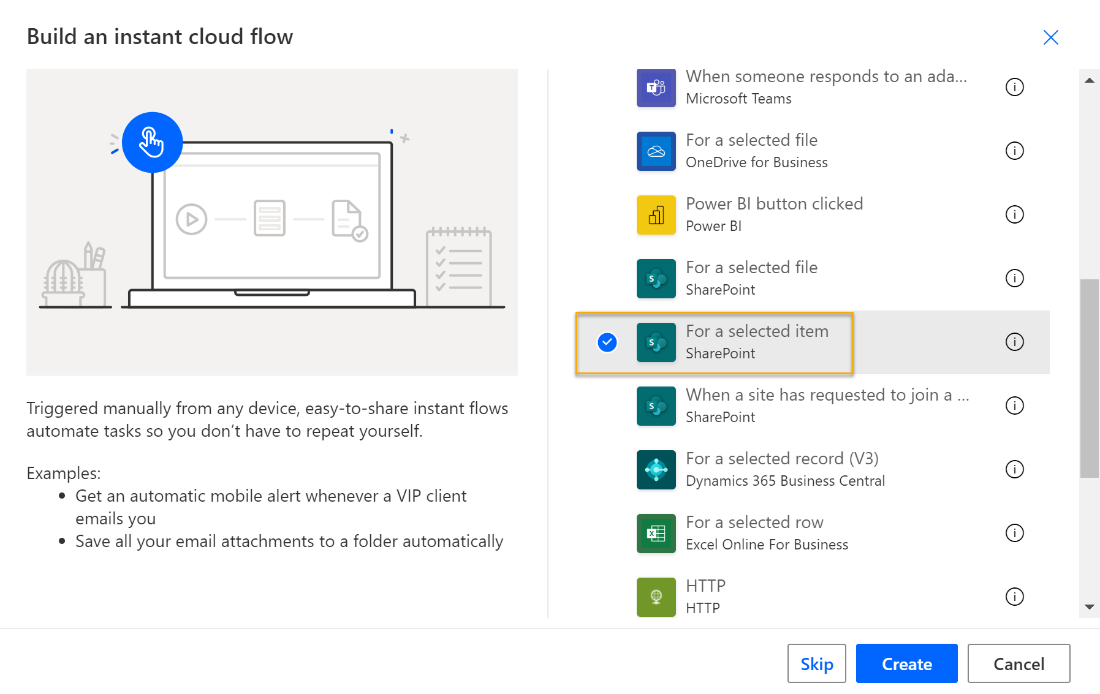
Supply a name for the Flow, select the For a selected item SharePoint trigger, and then click Create.
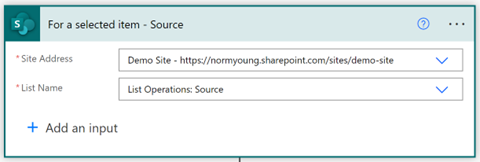
Set the “Site Address” and “List Name” to your source site and list (List Operations: Source).
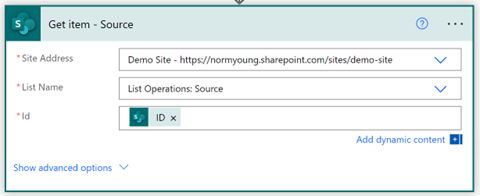
Click New step, search for SharePoint, and select the Get item action. Set “Site Address”, “List Name” to your source site and list (List Operations: Source). Set “Id” to ID from the “For a selected item” trigger.
Choice columns
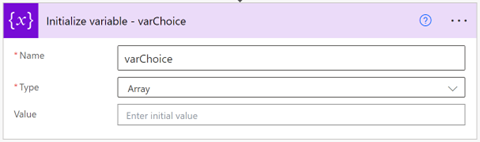
Insert a new Initialize variable step. Set “Name” to varChoice and “Type” to Array.
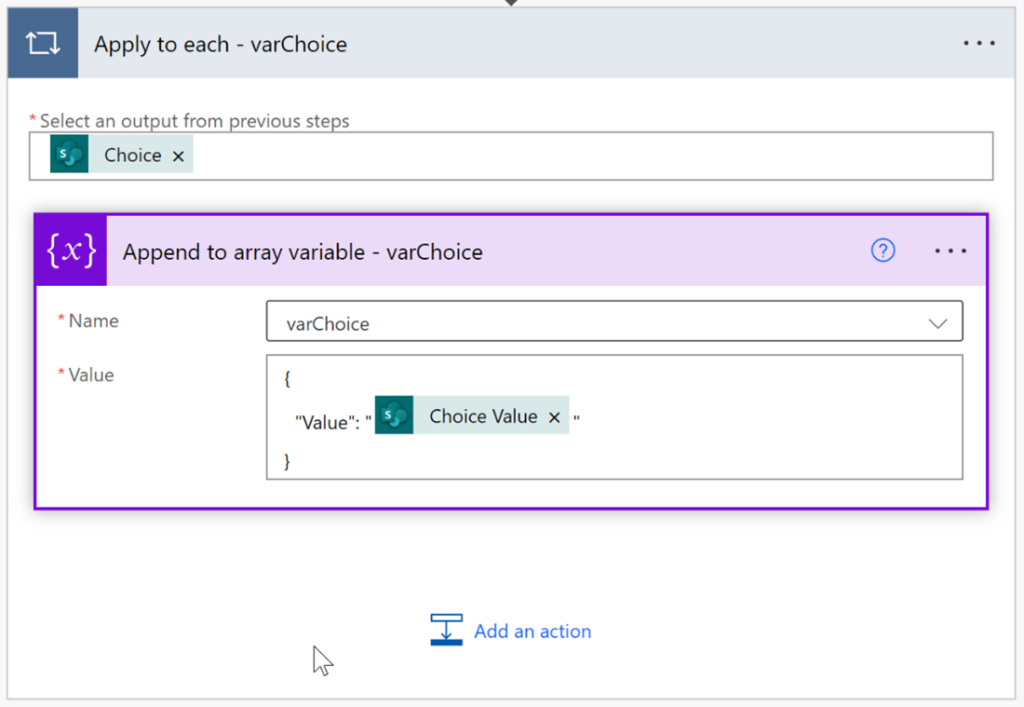
Add a new “Append to array variable” action. Set “Name” to varChoice and “Value” to:
{
“Value”: “Choice Value”
}
Choice Value will cause the “Append to array variable” action to be contained in an “Apply to each” loop. The loop, in turn, will build an array of the choice values that can be applied to the destination list.
Important: If your list has multiple Choice columns, you will need to create additional array variables, like varChoice, and then populate it using a similar approach to the “Append to array variable” pattern listed above.
Person columns
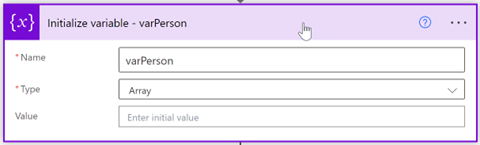
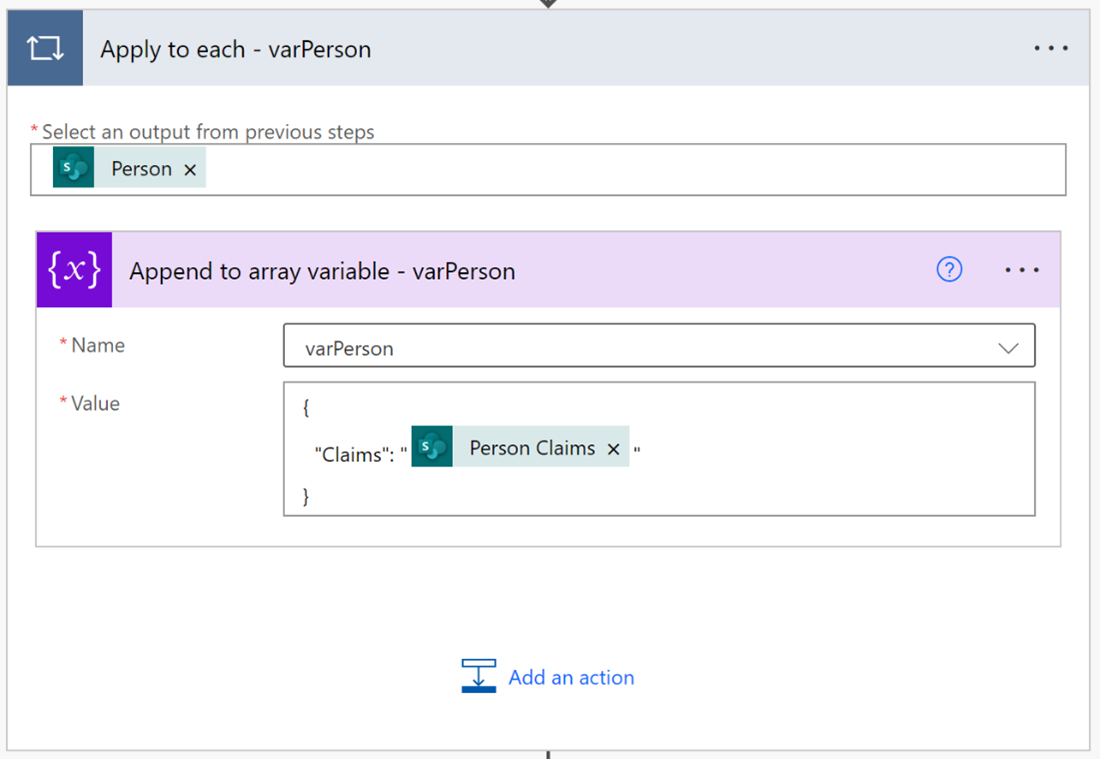
Insert a new “Initialize variable” step. Set Name to “varPerson” and Type to “Array”.
Add a new “Append to array variable” action. Set “Name” to varPerson and “Value” to:
{
“Claims”: “Person Claims”
}
Person Claims will cause the “Append to array variable” action to be contained in an “Apply to each” loop. The loop in turn will build an array of the Person claims values that can be applied to the destination list.
Important: If your list has multiple Person columns, you will need to create additional array variables, like varPerson, and then populate it using a similar approach to the “Append to array variable” pattern listed above.
Lookup columns
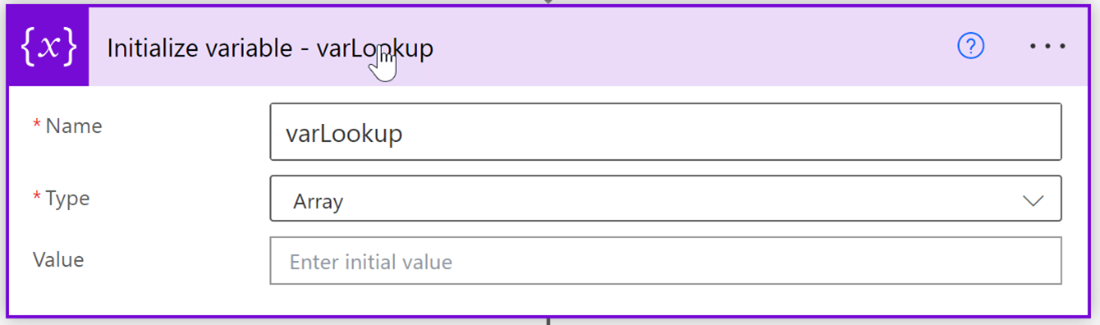
Insert a new “Initialize variable” step. Set Name to “varLookup” and Type to “Array”.
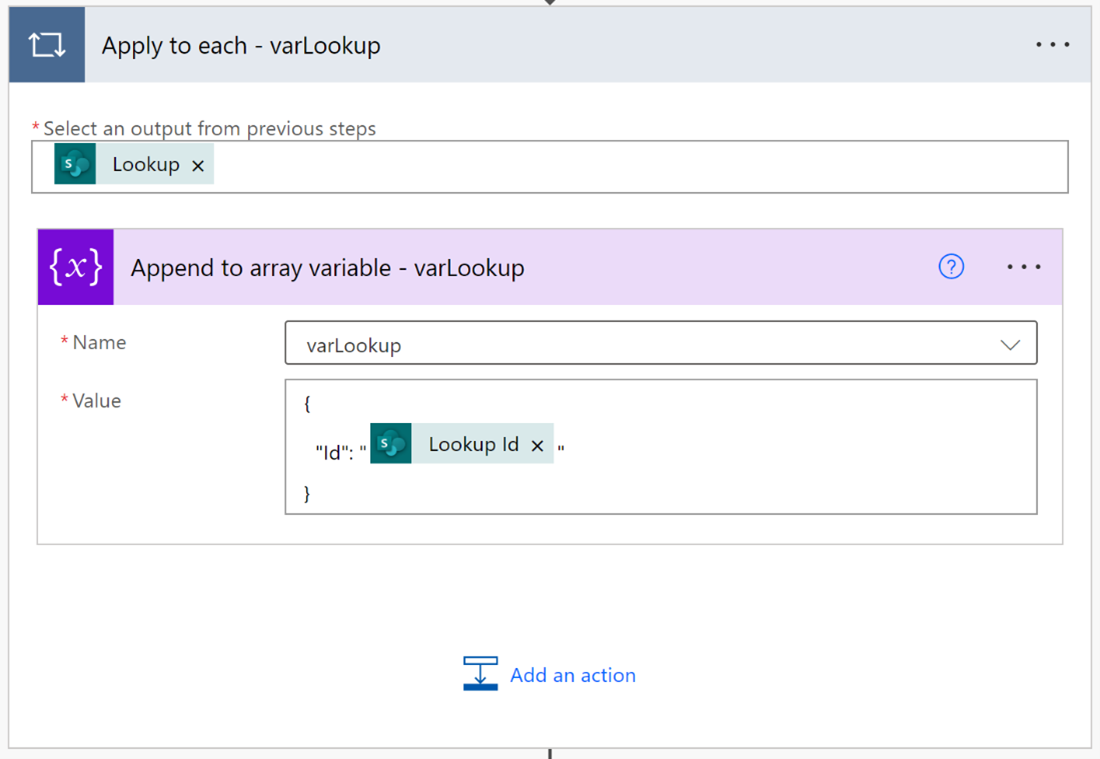
Add a new “Append to array variable” action. Set “Name” to varLookup and “Value” to:
{
“Id”: “Lookup ID”
}
Lookup ID will cause the “Append to array variable” action to be contained in an “Apply to each” loop. The loop in turn will build an array of the Lookup ID values that can be applied to the destination list.
Important: If your list has multiple Lookup columns you will need to create additional array variables, like varLookup, and then populate it using a similar approach to the “Append to array variable” pattern listed above.
Create item
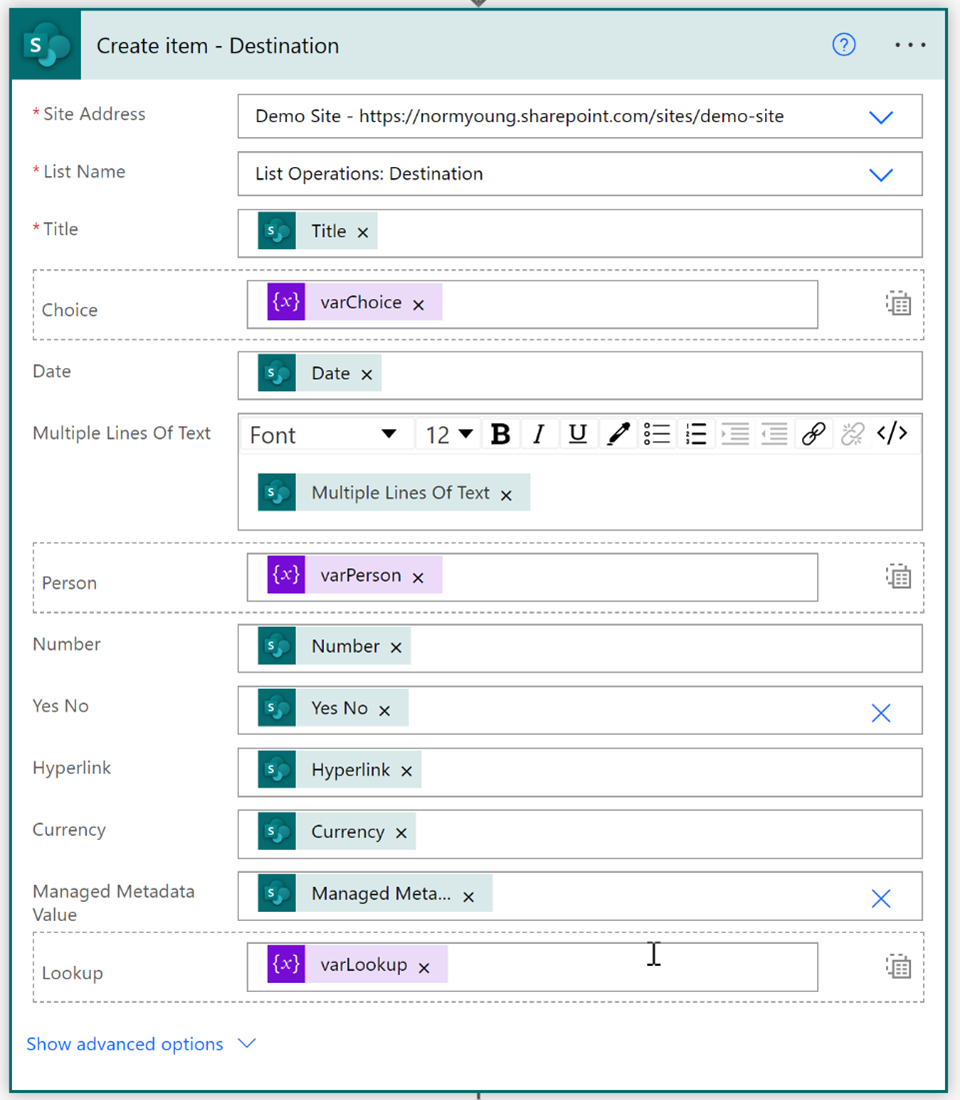
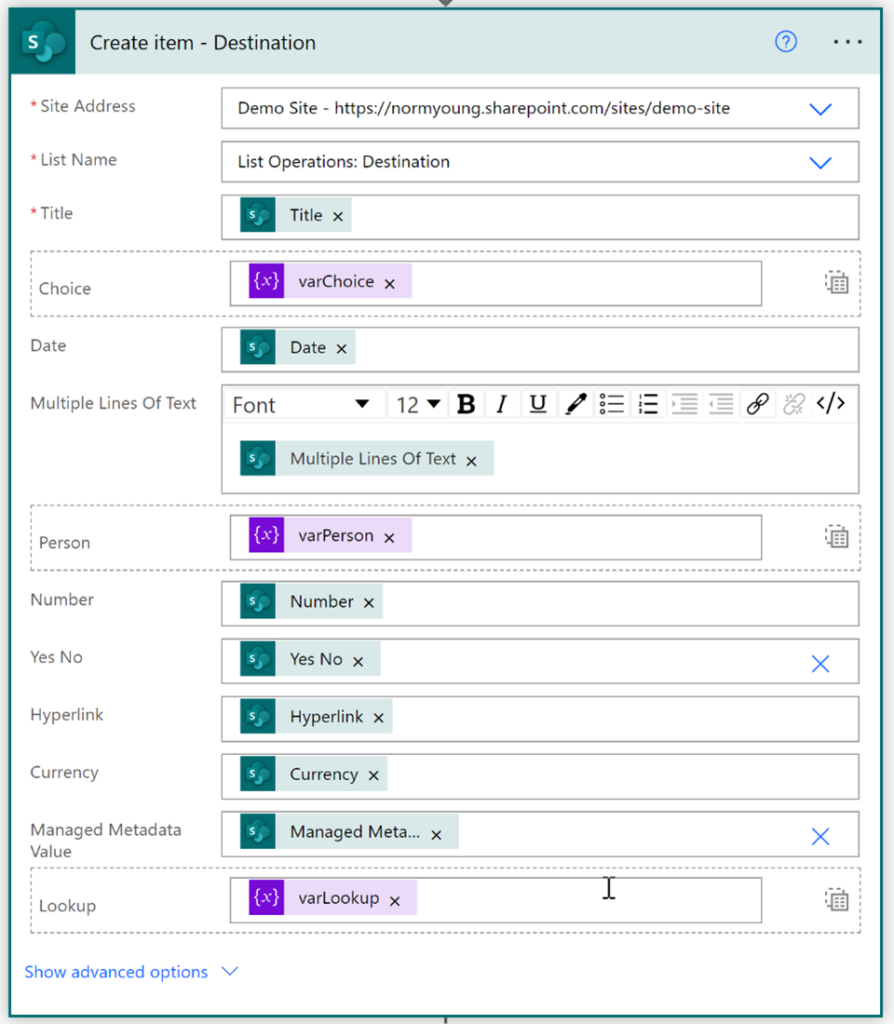
Insert a new SharePoint Create item action. Set “Site Address”, “List Name” to your destination site and list (List Operations Destination). Configure the action as follows:
- Set “Title” to Title from the Get item – Source action
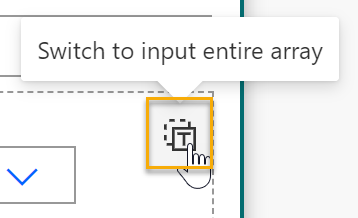
- For “Choice” click “Switch to input entire array” and then set “Choice” to varChoice
- Set “Date” to Date from the Get item – Source action
- Set “Multiple Lines Of Text” to Multiple Lines Of Text from the Get item – Source action
- For “Person” click “Switch to input entire array” and then set “Person” to varPerson
- Set “Number” to Number from the Get item – Source action
- Set “Yes No” to Yes No from the Get item – Source action
- Set “Hyperlink” to Hyperlink from the Get item – Source action
- Set “Currency” to Currency from the Get item – Source action
- Set “Managed Metadata Value” to Managed Metadata Value from the Get item – Source action*
- For “Lookup” click “Switch to input entire array” and then set “Choice” to varLookup *
*These columns depend on reference information outside of the source list and as such, those dependencies need to be available to destination list.
Attachments
Important: Attachments must be added after the destination list item has been created because there is no option to add attachments in the SharePoint “Create item” action.
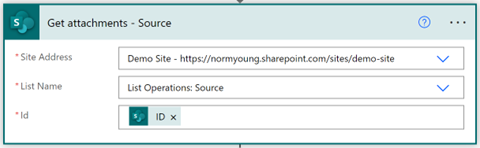
Insert a new SharePoint Get attachments action. Set “Site Address”, “List Name” to your source site and list (List Operations Source). Set “Id” to ID from the Get item – Source action.
Add a new SharePoint Get attachment content action. Set the “Site Address”, “List Name” to your source site and list (List Operations Source). Set “Id” to ID from the Get item – Source action. Set “File Identifier” to Id from the Get attachment – Source action.
ID, from Get attachment – Source, will cause the “Get attachment content” action to be contained in a “Apply to each” loop. The loop in turn will build an array of file contents from the attachments that can be applied to the destination list.

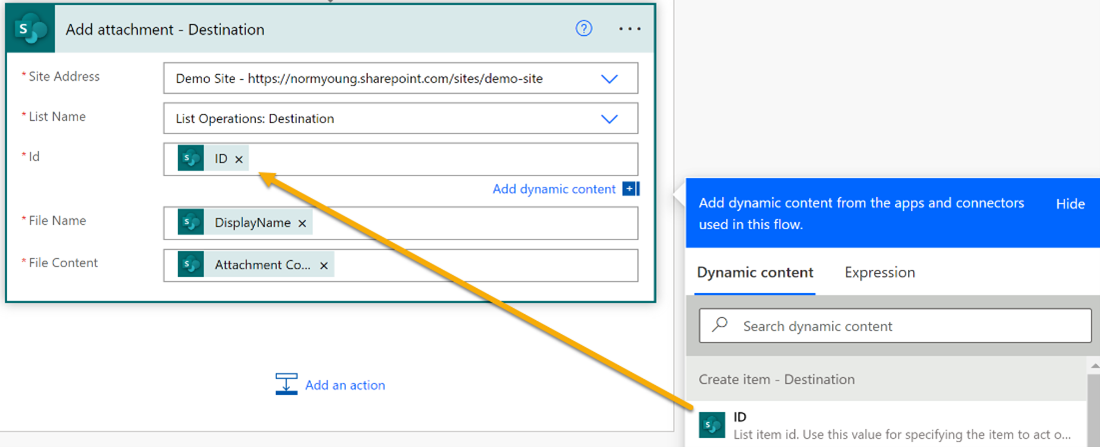
Insert a new SharePoint Add attachment action below “Get attachment content – Source”. Set the “Site Address”, “List Name” to your destination site and list (List Operations Destination).
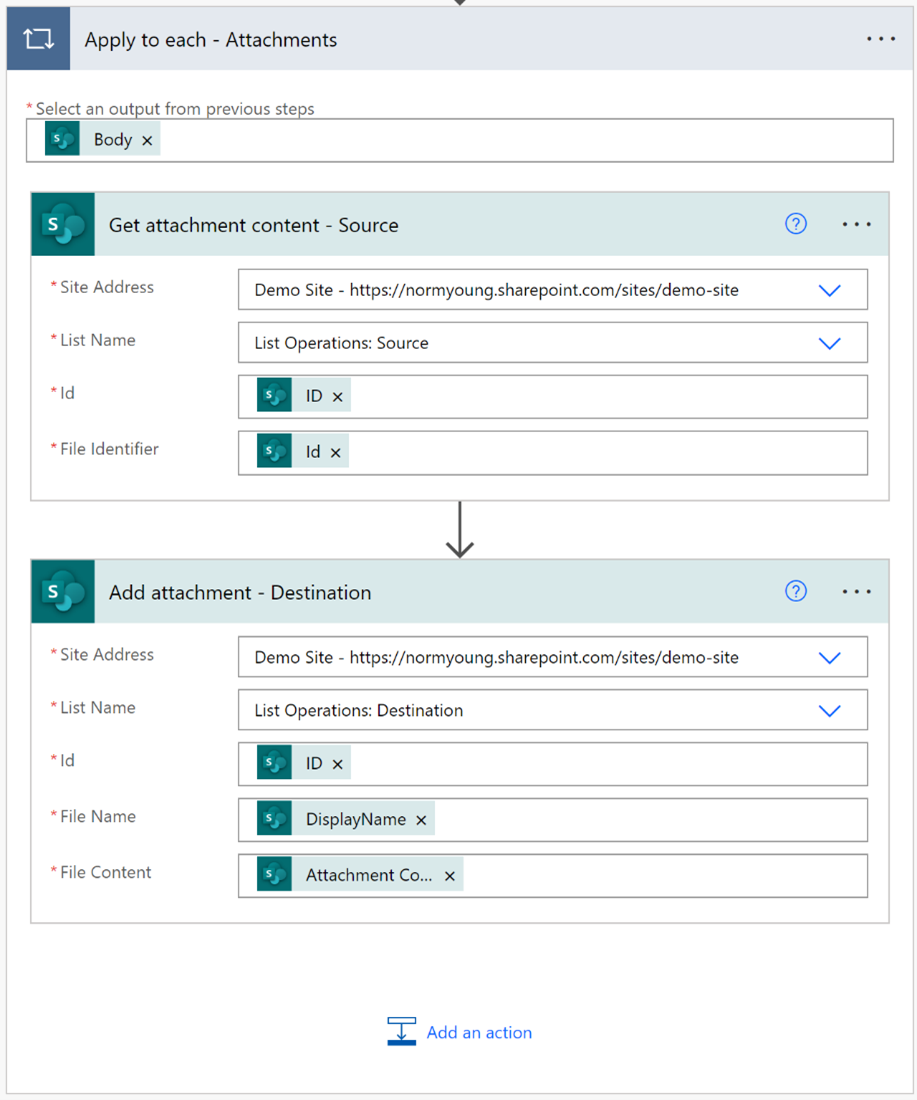
Set “Id” to ID from the Create item – Destination action.
Set “File Name” to DisplayName from the Get attachments – Source action.
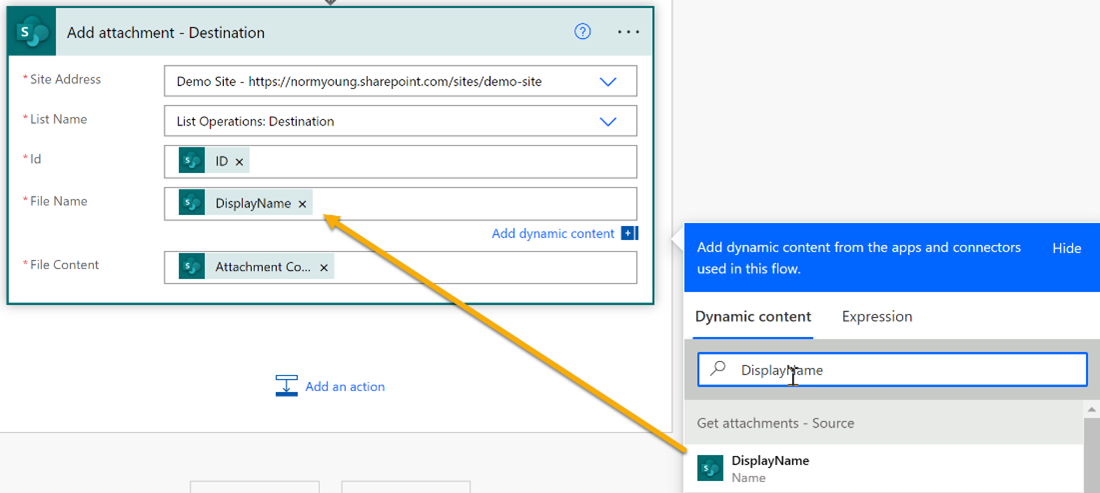
Set “File Content” to Attachment Content from the Get attachment content – Source action.
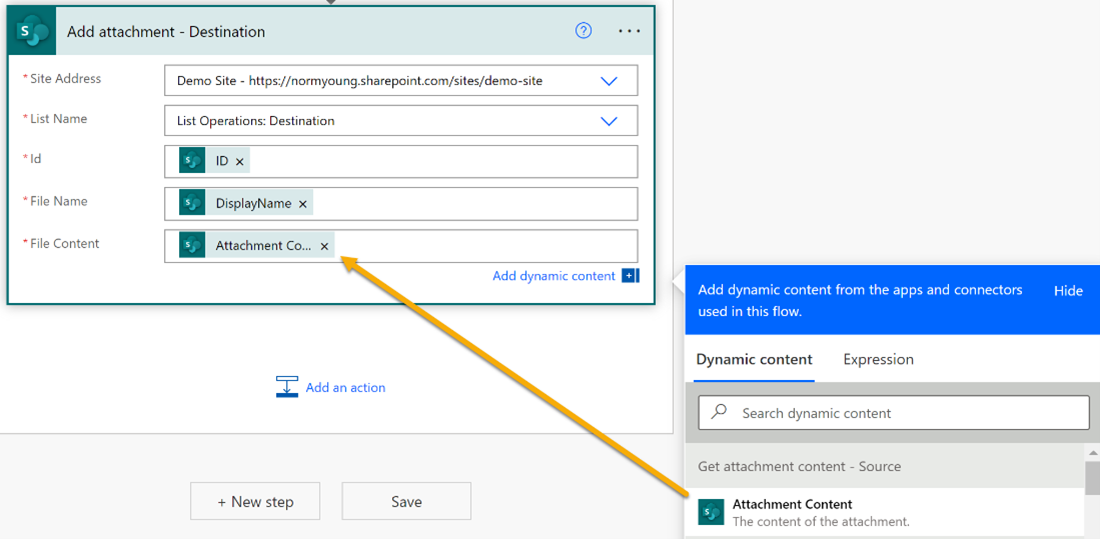
Important: With like-named actions, it’s easy to make a mistake here. Double-check everything on the “Add attachment” action!
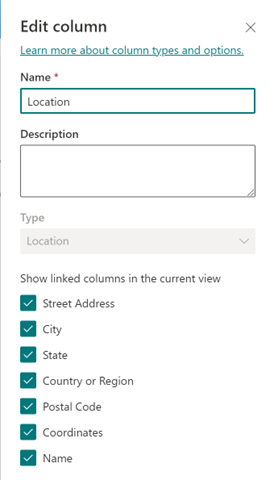
Location columns
Location columns allow for related column details like Street Address, City, State, Country or Region, Postal Code, and Coordinates. These columns are auto-populated and activated manually when creating/editing a Location column. We can see the related columns in the image below.
The SharePoint Create item action does not support Location columns, so depending on what related Location column details we are moving, we may need to use a Bing Maps Get location by address action and Send HTTPS Request to SharePoint to update our new destination item. These two actions are very much professional developer activities with API keys and REST API commands but don’t let this be a barrier to trying this on your own.
For Location Coordinates, insert a new Bing Maps Get location by address action, supply a “Connection Name”, “API Key” and click Create.
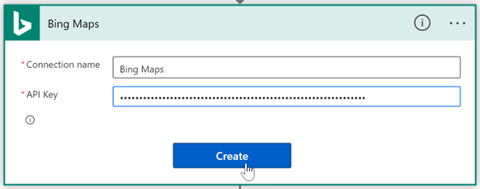
If this is your first time using Bing Maps in Power Automate, you will be prompted to create a new connection that requires an API key. You can setup your account at Bing Maps Dev Center – Bing Maps Dev Center (bingmapsportal.com). You will need a Basic / Dev/Test API key.
Configure Get location by address action as follows:
- “Address line” to Location: Street
- “Locality (City)” to Location: City
- “Admin district (State)” to Location: State
- “Postal code” to Location: Postal code
- “Country region” to Location: Country or Region
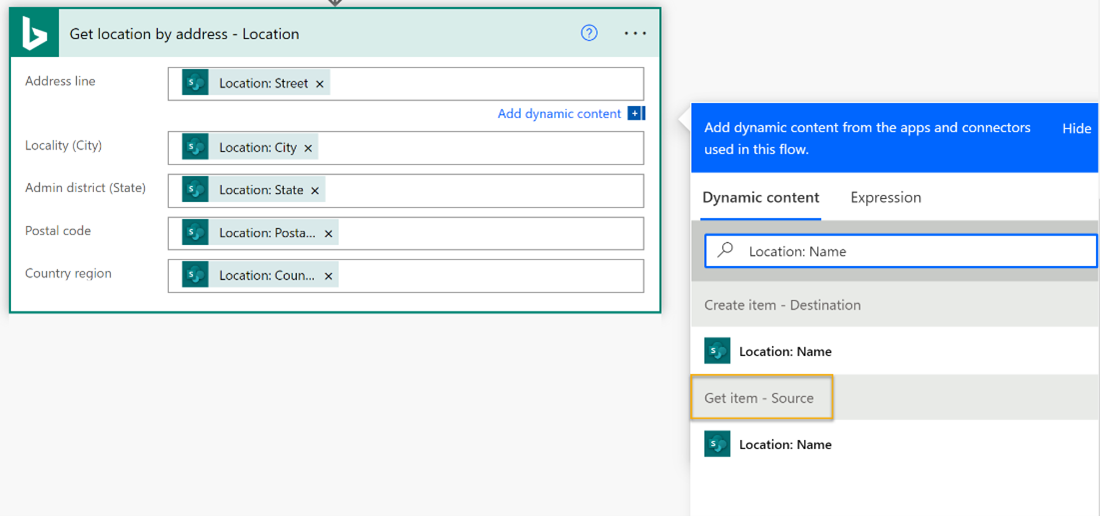
Important: Ensure you are using the Dynamic content from the Get item – Source action.
Add a new Send HTTPS Request to SharePoint action. Set the “Site Address” to your destination site (List Operations: Destination) and configure the action as follows:
-
- “Method” to: Post
- “Uri” to: _api/web/lists/GetByTitle(‘List Operations: Destination‘)/items(‘ID‘)
a. Where List Operations: Destination is the display name of the destination list
b. ID is from the “Create item – Destination” action
3. “Headers” to:
{
“content-type”: “application/json;odata=verbose”,
“IF-MATCH”: “*”,
“X-HTTP-Method”: “MERGE”
}
4. “Body” to:
{“__metadata”: { “type”:”SP.Data.ListOperationsDestinationListItem”}, ‘Location’:'{ “LocationSource”:”Bing”,
“LocationUri”:”https://www.bingapis.com/api/v6/addresses/…%3d?setLang=en-US”,
“UniqueId”:”https://www.bingapis.com/api/v6/addresses/..%3d?setLang=en-US”,
“DisplayName”:”Location: Name“,
“Address”:{
“Street”:”Location Street“,
“City”:”Location: City“,
“State”:”Location: State“,
“CountryOrRegion”:”Location: CountryOrRegion“,
“PostalCode”:”Location: PostalCode”
},
“Coordinates”:{
“Latitude”: Point Coordinates Latitude,
“Longitude”: Point Coordinates Longitude}
}’
}
a. Where ListOperationsDestination is the internal list name
b. Location: Name is from the “Get item – Source” action
c. Location Street is from the “Get item – Source” action
d. Location: State is from the “Get item – Source” action
e. Location: CountryOrRegion is from the “Get item – Source” action
f. Location: PostalCode is from the “Get item – Source” action
g. Point Coordinates Latitude is from the “Get location by address ” action
h. Point Coordinates Longitude is from the “Get location by address ” action
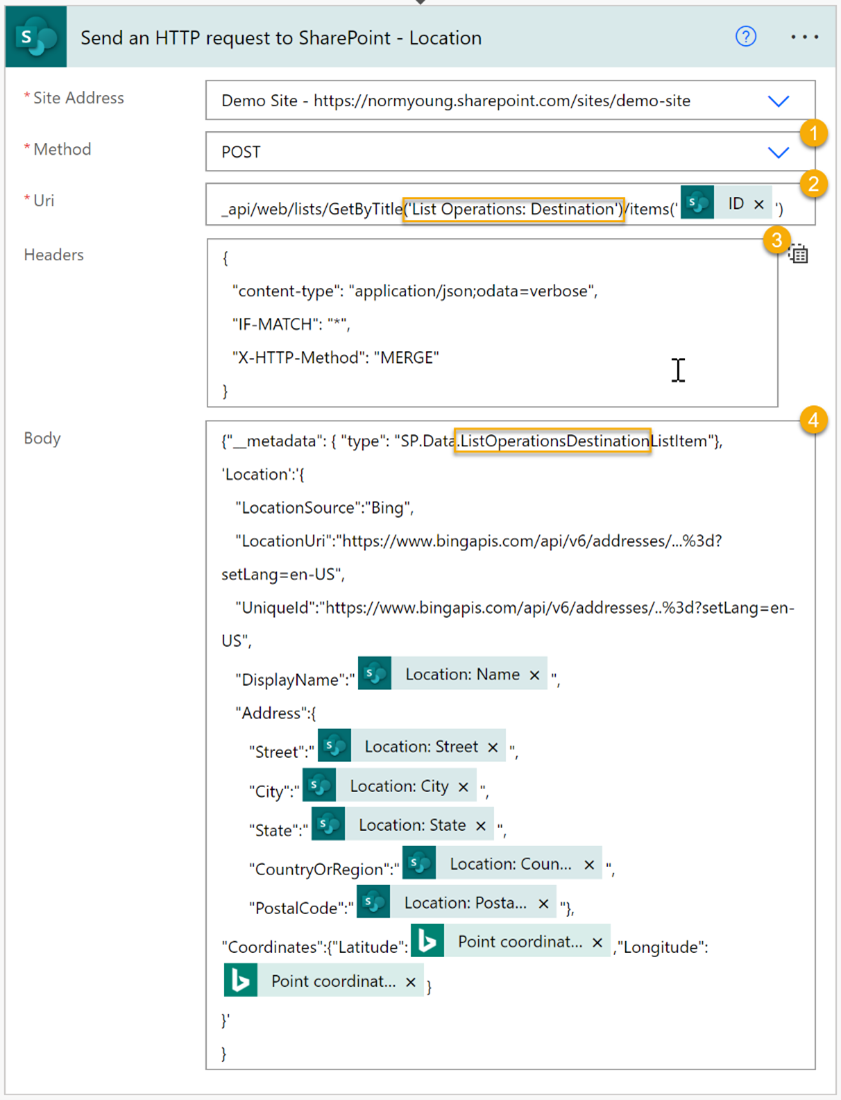
Image columns
Behind the scenes, Image columns are called Thumbnail columns and should not be confused with attachments or hyperlinks to image files. Image columns stores the file in the “Site Assets” library and display a thumbnail image within the list item. These are the trickiest of columns to copy using Power Automate and we will need our Flow to gather image metadata, create the image in the destination site, and finally update the newly created destination list item.
Get Destination List ID
These actions supply the folder location name in the destination “Site Assets” library.
Add a new Send HTTPS Request to SharePoint action. Set the “Site Address” to your destination site (List Operations: Destination) and configure the action as follows:
-
- “Method” to: Get
- “Uri” to: _api/web/lists/GetByTitle(‘List Operations: Destination‘)
a. Where List Operations: Destination is the display name of the destination list

Insert a new Compose action and set “Inputs” to Body from the Send HTTPS Request to SharePoint – List ID action.

Test your Flow and copy the outputs from the Compose – List ID action.
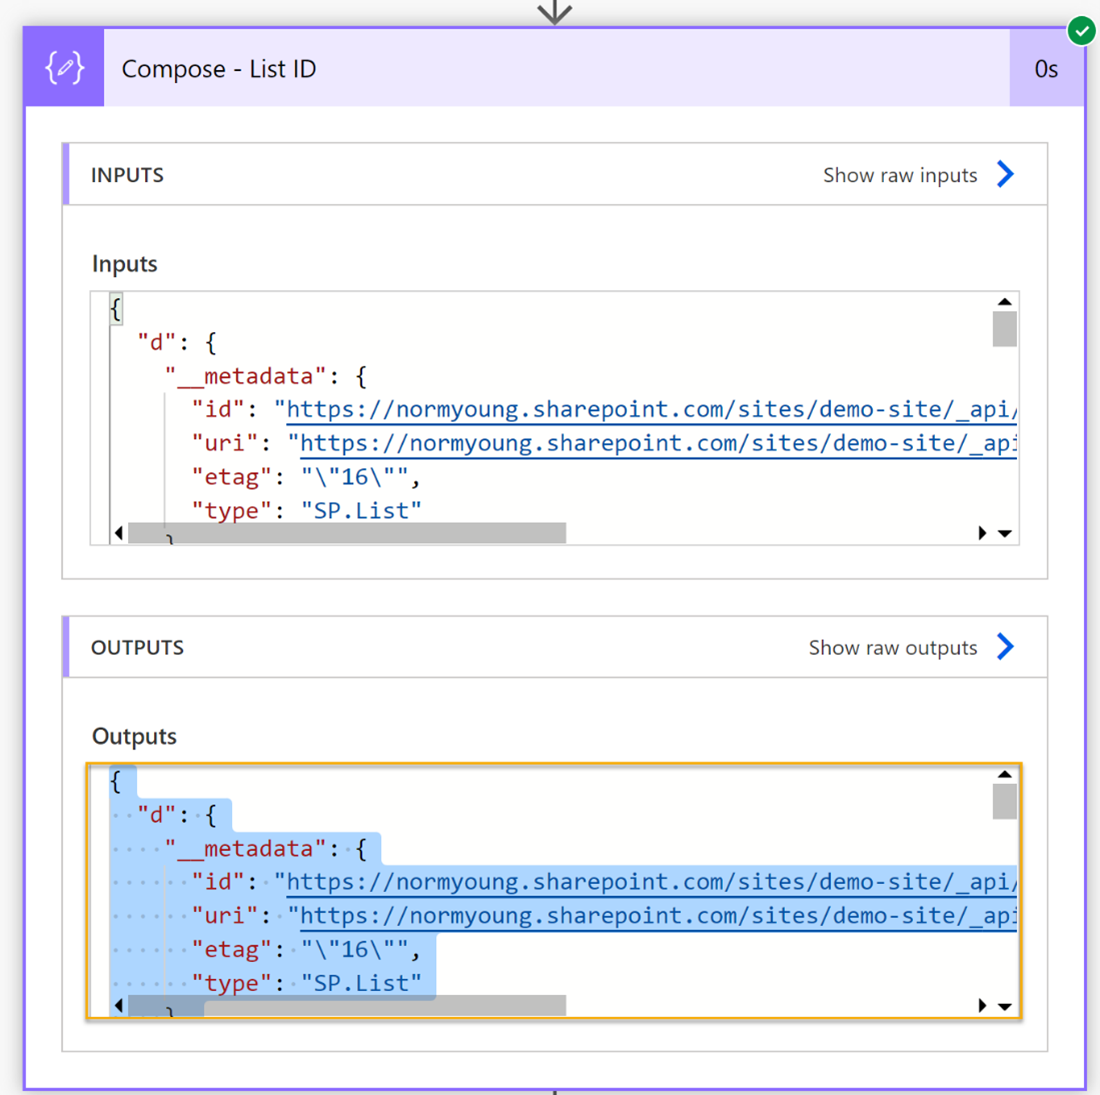
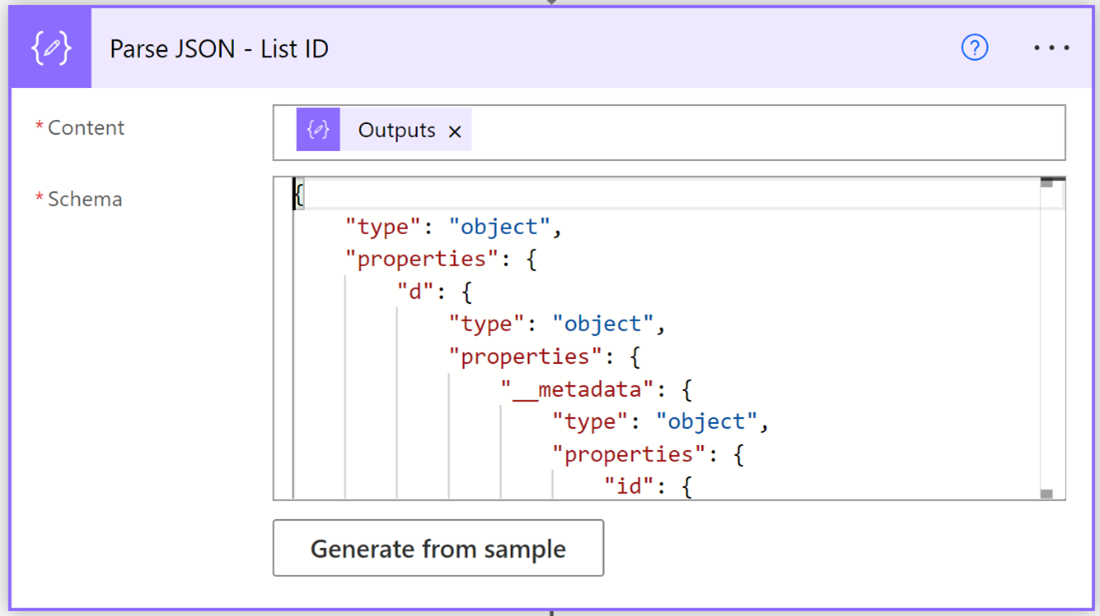
Add a new Parse JSON action and set “Contents” to Outputs from the Compose – List ID action. Click Generate from sample and paste in the Outputs that you copied from the Compose – List ID action.
Get Source File Metadata
These next set actions get the source image file metadata and file content.
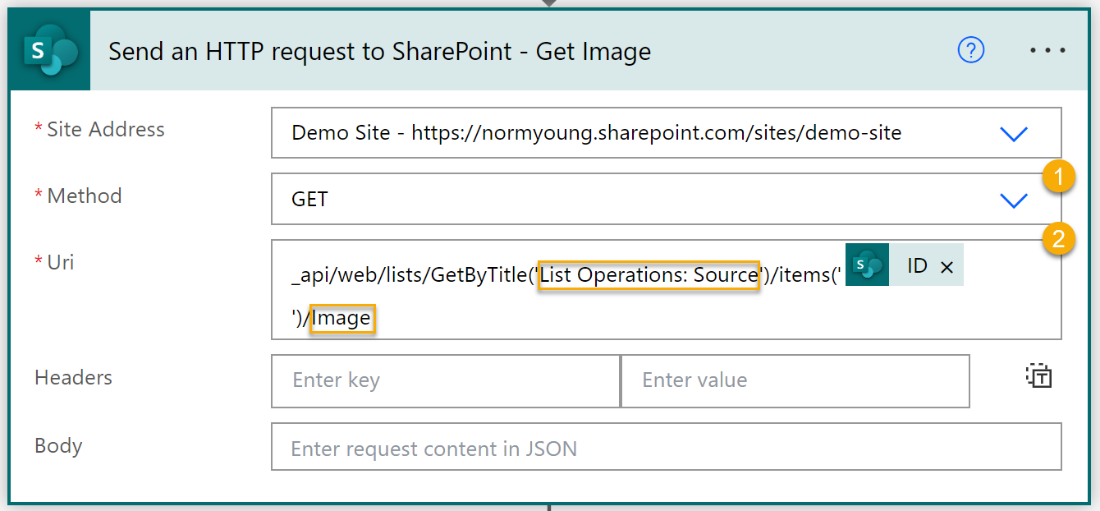
Add a new Send HTTPS Request to SharePoint action. Set the “Site Address” to your source site (List Operations: Source) and configure the action as follows:
-
- “Method” to: Get
- “Uri” to: _api/web/lists/GetByTitle(‘List Operations: Source‘)/items(‘ID‘)/Image
a. List Operations: Source is the display name of the source list
b. ID is from the “Get item – Source” action
c. Image is your image column name
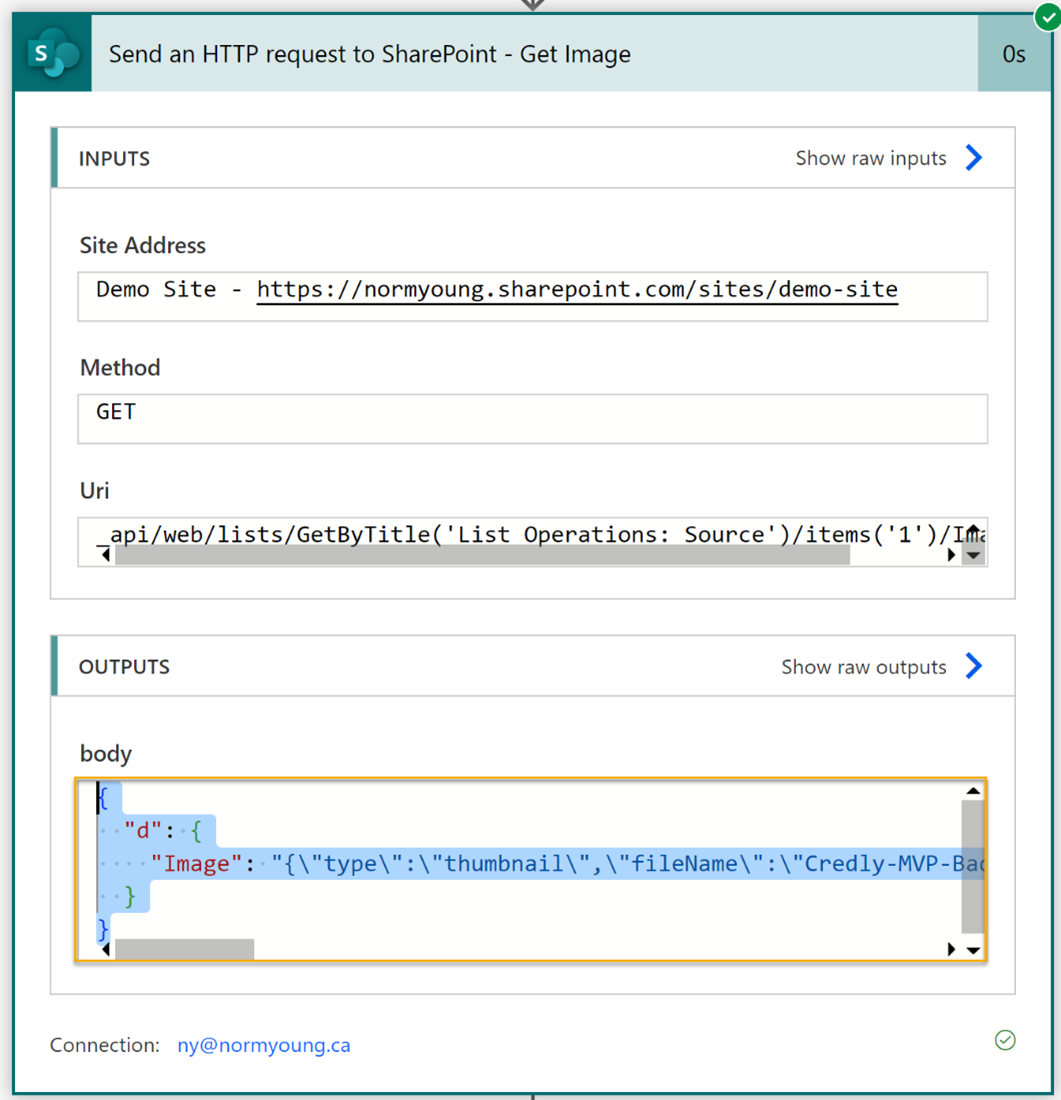
Test your Flow and copy the body (from Outputs) from the Send HTTPS Request to SharePoint – Get Image action.
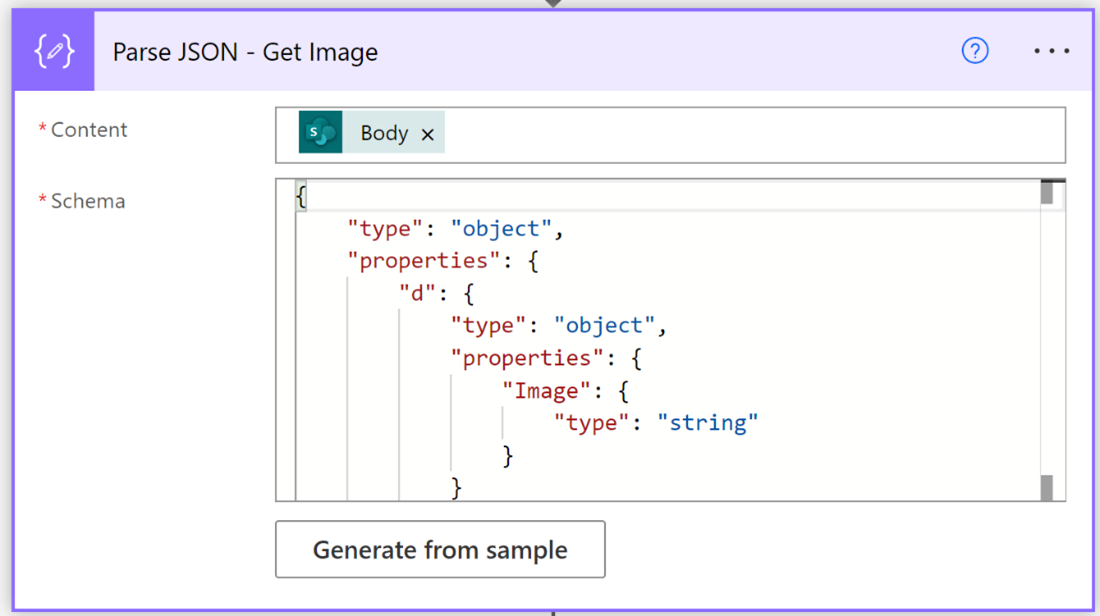
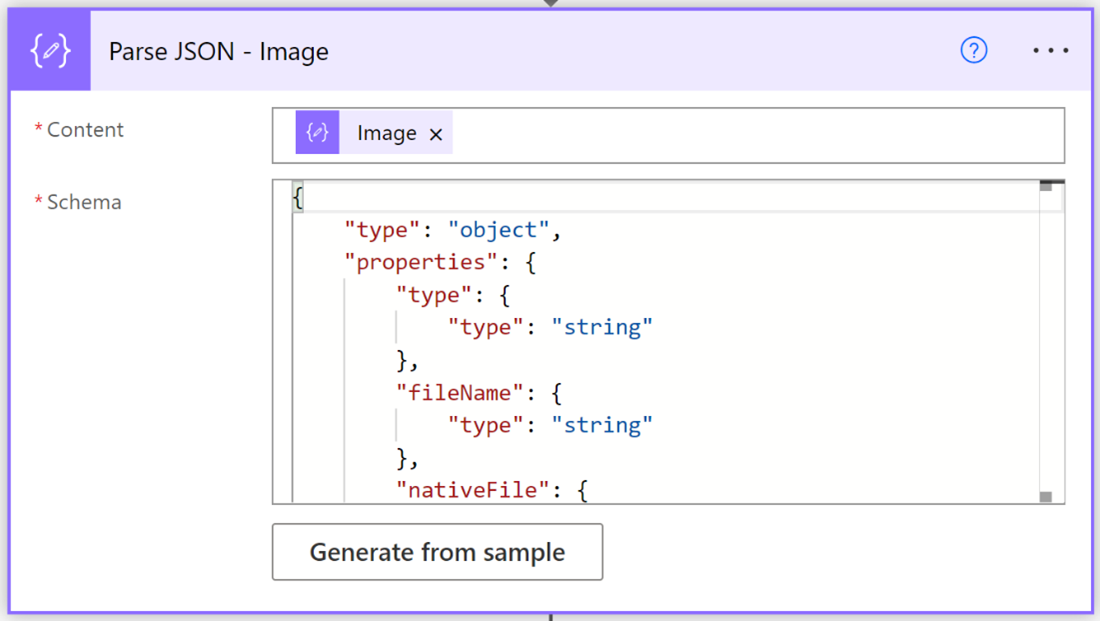
Insert a new Parse JSON action a and set “Contents” to Body from the Send HTTPS Request to SharePoint – Get Image action. Click Generate from sample and paste in the body that you copied from the Send HTTPS Request to SharePoint – Get Image action.
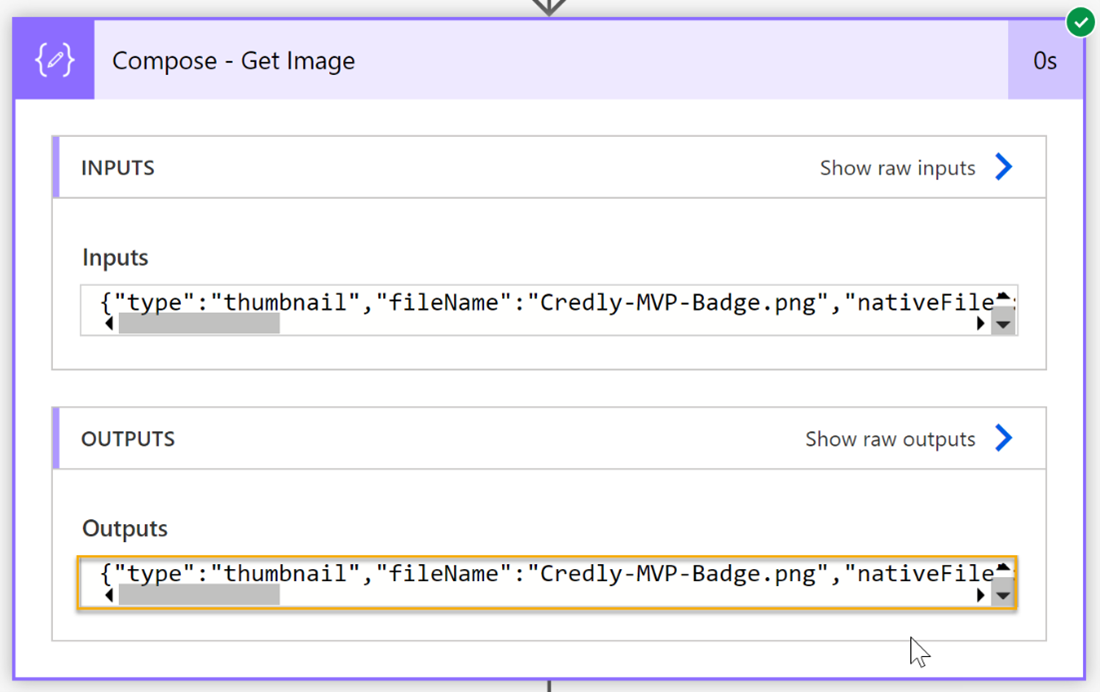
Add a new Compose action and set “Inputs” to Image from the Parse JSON – Get Image action.

Test your Flow and copy the Outputs from the Compose – Get Image action.
Insert a new Parse JSON action a and set “Contents” to Image from the Parse JSON – Get Image action. Click Generate from sample and paste in the Outputs that you copied from the Compose – Get Image action.
Copy Source Image to Destination
The following actions will copy the image file in the destination sites “Site Assets” library list folder and finally update the destination list Image column.
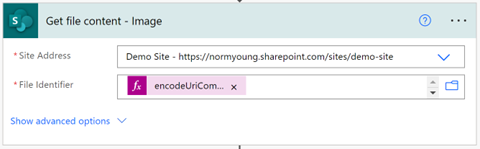
Add a new SharePoint Get file content action. Set the “Site Address” to your source site and “File Identifier” to the following expression:
encodeUriComponent(slice(body(‘Parse_JSON_-_Image’)?[‘serverRelativeUrl’], nthIndexOf(body(‘Parse_JSON_-_Image’)?[‘serverRelativeUrl’], ‘/’, 3)))
This expression will find the path to the source image file location in the “Site Assets” library and was created using the Format data by example expression builder option.
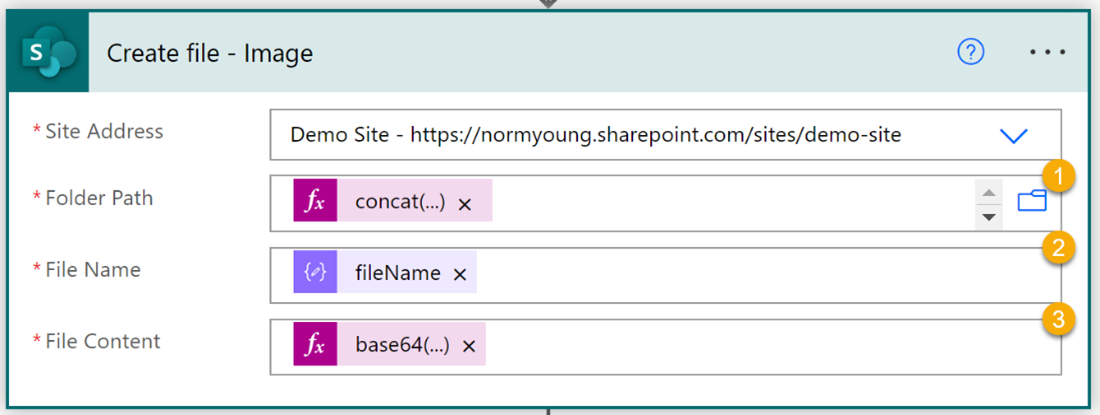
Insert a SharePoint Create file action. Set the “Site Address” to your destination site and configure the following options:
-
-
- “Folder Path” to the following expression:
concat(‘/SiteAssets/Lists/’, body(‘Parse_JSON_-_List_ID’)?[‘d’]?[‘Id‘])
- “Folder Path” to the following expression:
-
a. Id is from the “Parse JSON – List ID” action
2. “File Name” to fileName from the “Parse JSON – Image” action
3. “File Content” to the following expression:
base64(outputs(‘Get_file_content_-_Image’)?[‘body‘])
a. Body is from the “Get file content – Image” action
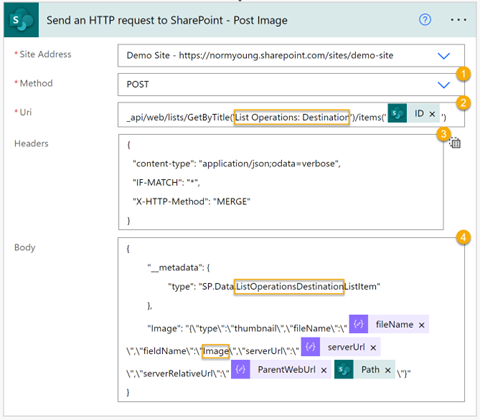
Add a new Send HTTPS Request to SharePoint action. Set the “Site Address” to your destination site (List Operations: Destination) and configure the action as follows:
-
-
- “Method” to: Post
- “Uri” to: _api/web/lists/GetByTitle(‘List Operations: Destination‘)/items(‘ID‘)
-
a. List Operations: Destination is the display name of the destination list
b. ID is from the “Create item – Destination” action
3. “Headers” to the following:
{
“content-type”: “application/json;odata=verbose”,
“IF-MATCH”: “*”,
“X-HTTP-Method”: “MERGE”
}
4. “Body” to the following:
{
“__metadata”: {
“type”: “SP.Data.ListOperationsDestinationListItem”
},
“Image”: “{\”type\”:\”thumbnail\”,\”fileName\”:\”fileName\”,\”fieldName\”:\”Image\”,\”serverUrl\”:\”serverUrl\”,\”serverRelativeUrl\”:\”ParentWebUrlPath\”}”
}
a. fileName is from the “Parse JSON – Image” action
b. serverURL is from the “Parse JSON – Image” action
c. Image is the source list column name
d. ParentWebUrl is from the “Parse JSON – Image” action
e. Path is from the “Create file – Image” action
Import Note: There is no space between ParentWebUrl and Path
User experience
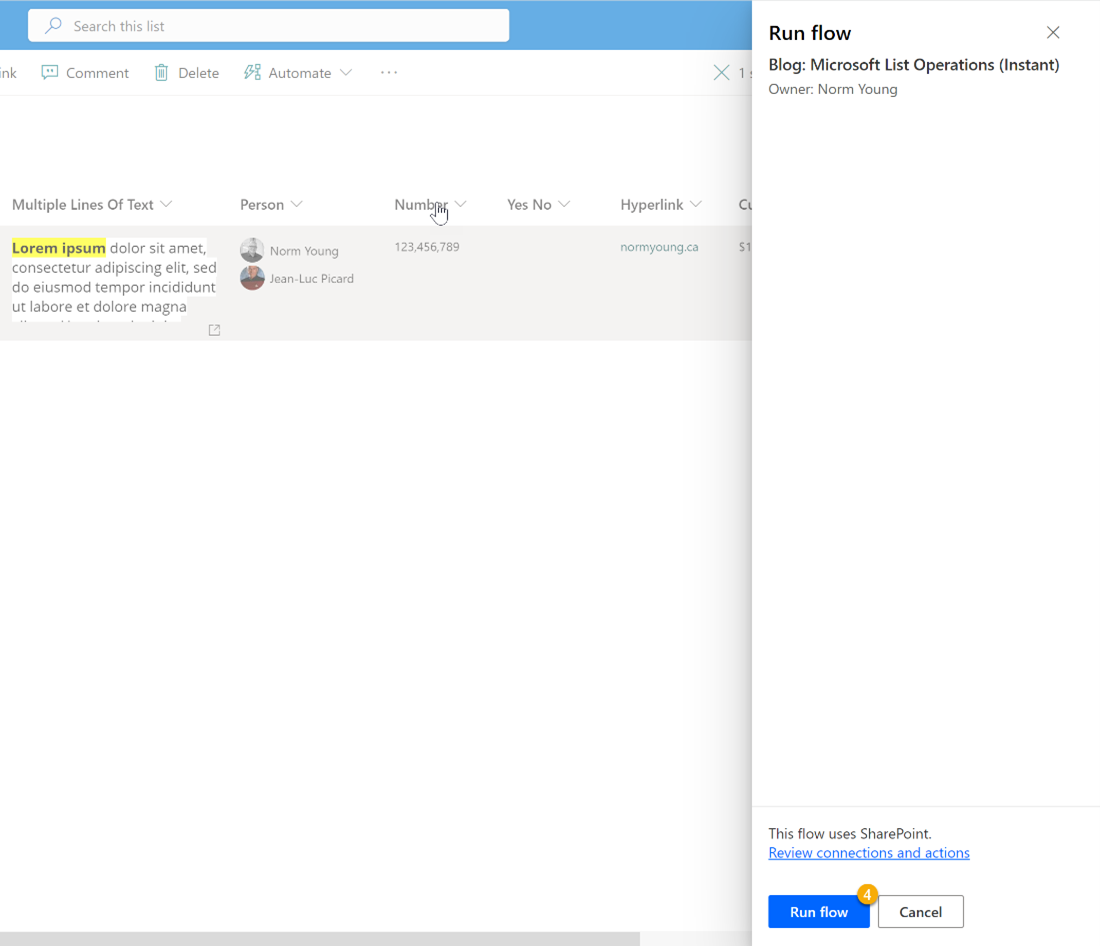
Power Automate integrates well with SharePoint via the Automate command bar feature. To launch our Flow, we need to:
-
- Select our source item
- Click Automate
- Select our Flow. In this example, my Flow is called “Blog: Microsoft List Operations (Instant)”
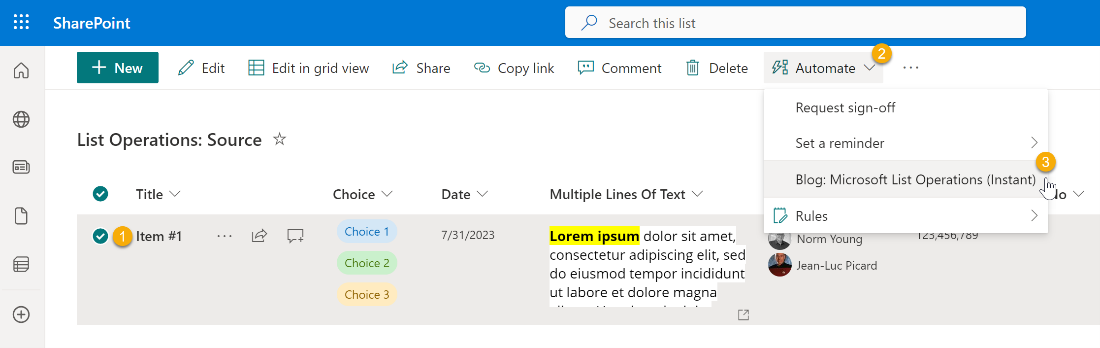
- Click Run Flow
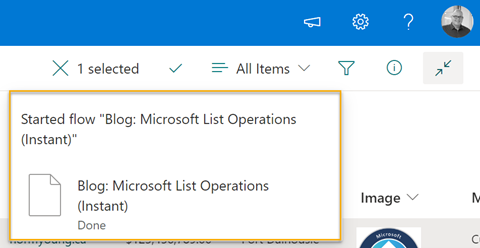
Notice the list feedback showing that the Flow has started.
If all goes well, we should see the row from source added as a new item in destination, including multiple Choice and Person values, attachments, Location details, Image thumbnail, and more. Check out demo shown below.
Our Flow pattern is lengthy and complicated because we are accounting for all the different list column types. There is a very good chance that your requirements will be different, and you can adjust your Flow to match. Moving data is a common IT task that comes in many different forms. With the Power Platform democratizing traditional IT tasks having a Flow pattern like the one we covered in this blog post will help our makers and business technologists alike get a head start on their Power Automate journey.
Thanks for reading!

Norm Young is a Power Platform Solution Architect at AvePoint. He is a five-time Microsoft MVP in both Business Applications and M365 with a focus on Power Platform governance. Norm blogs and speaks about Microsoft 365, the Power Platform, and how they are better together. Outside of work, Norm enjoys camping, running, CrossFit, and cycling.