Shared calendars help provide visibility and overview over your team’s tasks, schedules, meetings, and other important details which help in sustaining collaboration between teams and departments.
Creating shared calendars is actually pretty easy when you’re dealing with a small group. You can manually type in five user email addresses and you’re set. But how do you deal with large groups boasting a hundred users?
Read on as we go over two easy ways to create shared calendars for large groups without the confusing matrix of going over multiple admin centers and manually typing out a hundred email addresses.
1. Create a Shared Mailbox/Calendar in Exchange Online
Setting up a shared calendar in Exchange Online is easy to accomplish when you have the appropriate permissions. It pays off in the end as well as you’ll be able to assign, edit, or delete permissions more simply in the future as you can do it by Group.
Here’s an overview of what you have to do:
- Create a mail-enabled security group
- Create a shared mailbox
- Give full access
Create a Security Group
Security Groups (or mail-enabled security groups) are specifically designed so members in a Group can easily have access to your shared resources. By creating a security group, you create a manageable unit where you can assign permissions without having to configure each user’s access settings.
- In the Exchange Admin Center (EAC), toggle Recipients and choose Groups. Select Add a group.
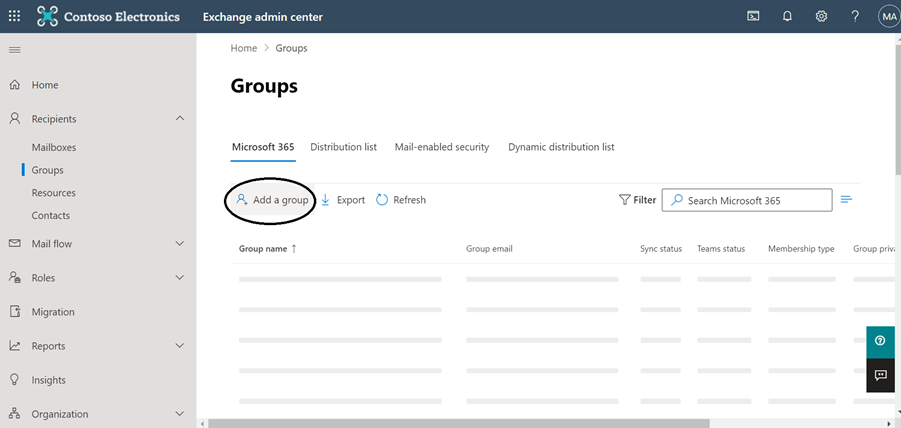
- Choose Mail-enabled security.
- Set up the basics by naming your group and entering a description. After you finish setting up, wait for about 2 minutes until your new group reflects on the EAC groups list.
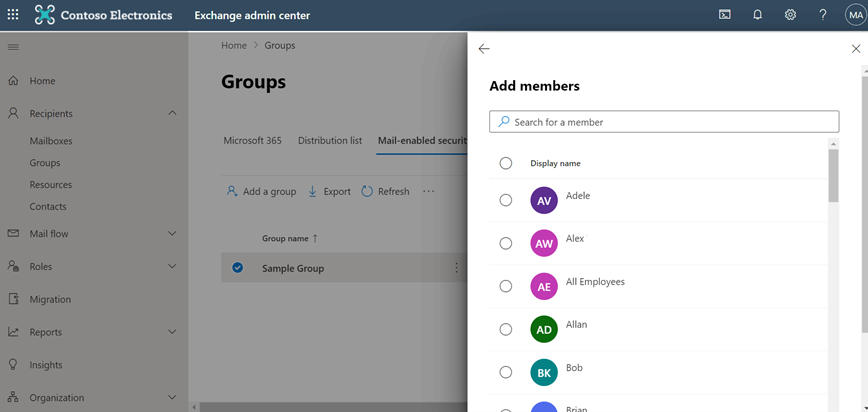
- Once it reflects under mail-enabled security, you can click your newly-created group and go to Members>View and manage members to add users to your group.
- You can then choose from the list of individual members and your existing groups.
Set up a Shared Mailbox
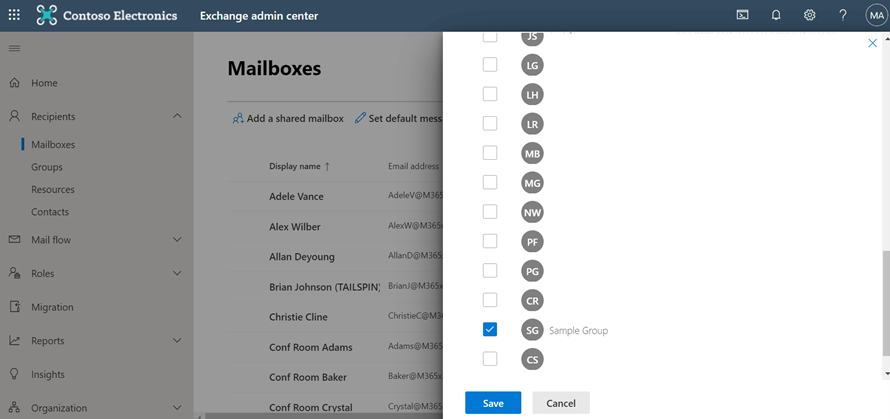
- After setting up your security group with your desired members, you need to create a shared mailbox with your newly-created security group as your membership list.
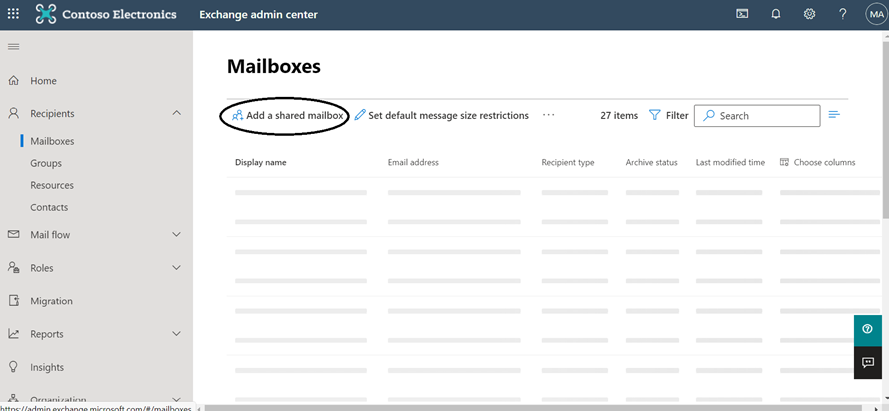
- As soon as your shared mailbox is created, add users.
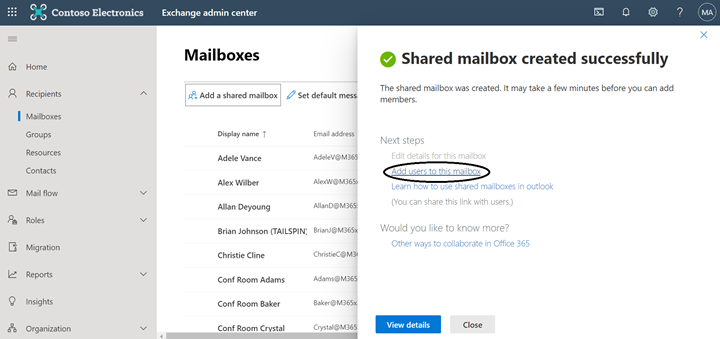
- You’ll be able to see your created group. Choose your group and click save.
Do note, though, that because you are creating a shared mailbox, you are then allowing users from your membership list to access and respond to emails sent from that mailbox.
Assign Full Access (Read and Manage) Permission
- Once you’ve added your members/group, click your new mailbox and select Manage your mailbox delegation.
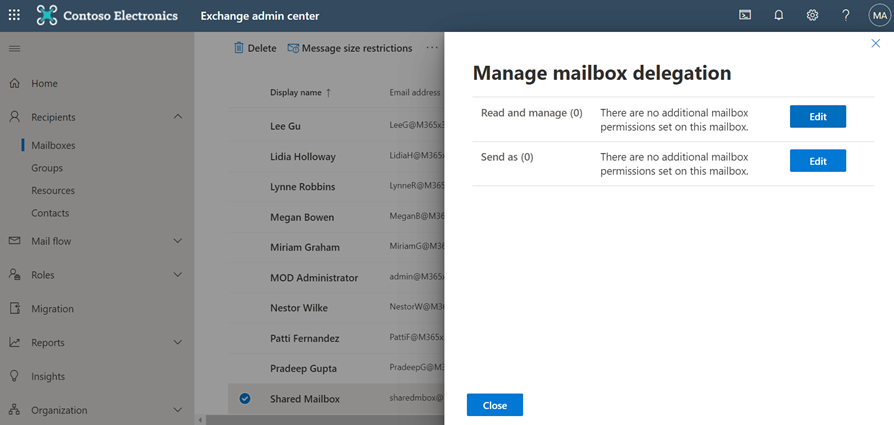
- If you want your members to have full access and be able to edit your calendar, add them to the Read and manage permissions.
And that’s it! Your users can now access and edit your mailbox and, of course, your calendar!

2. Use a SharePoint Calendar
You can create a group calendar in SharePoint via two paths:
- Using the SharePoint calendar app on a team site.
- Creating a list with a calendar view.
These processes are much easier, especially if your group already has a team site.
Using the SharePoint Calendar App
The first thing to remember here is that you would need appropriate access to the SharePoint site you’ll be creating a calendar for. Make sure the site is public so it can be made available to other users who need to access it.
Let’s divide the process into two general instructions:
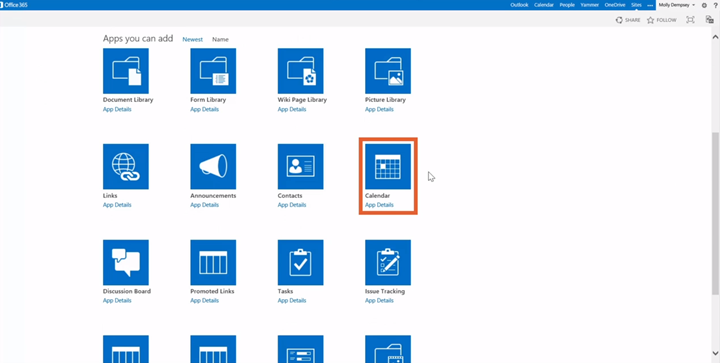
- Add the calendar app to your site’s list.
- On the settings menu of your team site, click Add an app. Choose the Calendar app on the given list.
- Select Advanced Option, then type the name of the calendar together with a brief description. Chose Yes so other users can share and track event schedules of other coworkers.
- Click Create.
- Add the created calendar to the team site.
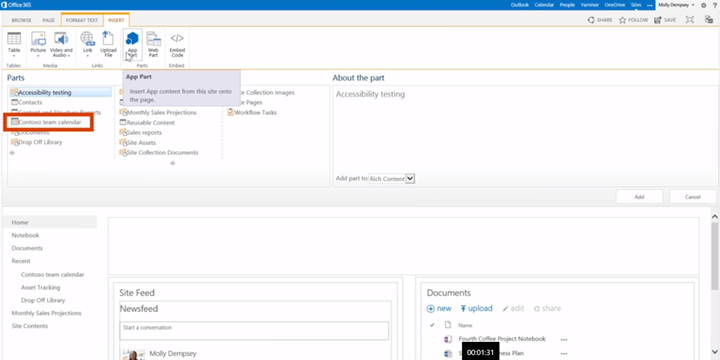
- Once you’ve created your calendar app, navigate back to Home.
- Go back to the settings menu and select Edit page to go to the edit mode of your team site where you’ll be able to insert your calendar.
- Select the Insert tab, then place your cursor to where you’d like your calendar to appear.
- Next, choose App Part. You’ll see then that the calendar you just created will be listed. Click that and select Add.
- Once it appears where it should be, go to the Format Text tab and click Save.
You now have a calendar on your team site where your members can edit and track events!
Using Lists with a Calendar View
Lists is a handy tool if you need to track information like events, tasks, and project schedules. Like the SharePoint calendar app, Lists are also generally available to members on your team site.
For now, let’s get to creating your calendar through Lists:
- Create a blank list
- On your SharePoint site, choose +New>List. Under Create a List, select Blank List.
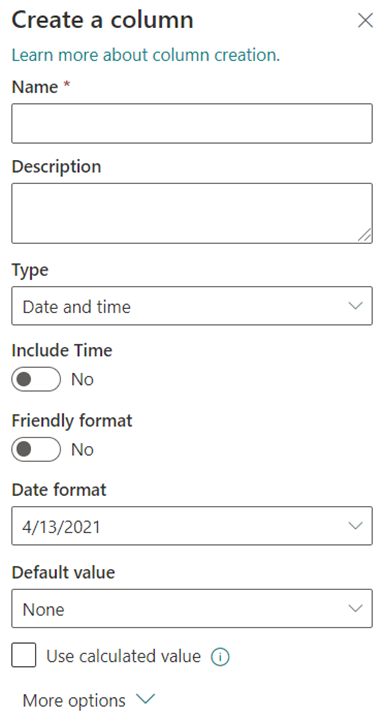
- At the top of the list or library, select +Add column or +. Choose the type of column you want from the menu. You will need at least one date and time column.
- Enter the required information in the Create a column section. Repeat until you have all the columns you need.
- Add and review your list data.
- Select Edit in grid view in the command bar.
- Enter the necessary information for each list item. Once done, select Exit grid view.
- Set to calendar view
- Go to the View options menu found on the upper right-hand side of the command bar, then choose Create new view.
- Enter a name under View name, then select Calendar for the type of view under Show as.
- Choose the date-based column/s that apply for your list under the Start date and End date.
- Under More options, you can customize which column in your list (“Title” is used by default) you’d like to show as the label that appears on the calendar.
- Click Create.
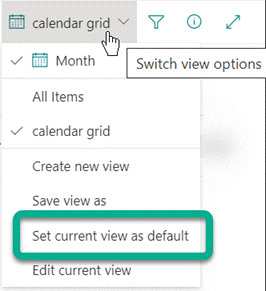
- Set the calendar view as default
- On the right corner of the command bar, click the View options
- Select Set current view as default.
Your list items are not only displayed as calendar events; the list will also be shown as a calendar where your members can view and create items every time they open the list!